

Blog . How to Make a Color More Vibrant in Adobe Photoshop
Blog
How to Make a Color More Vibrant in Adobe Photoshop
11/26/13 | Posted by Leah Yochman | Posted in Digital Creativity


If you've ever taken a photo and wished that a certain color would be more vibrant, this tutorial will show you how to make that wish come true!
Step 1.
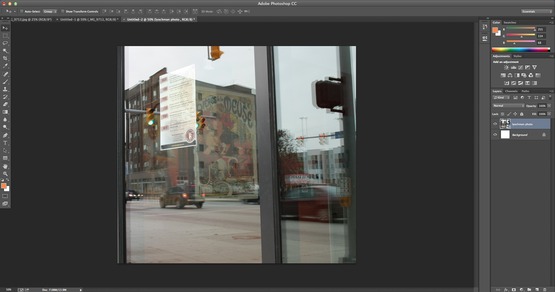
Open your file in Photoshop
Step 2.
There is a small window on the right above the layers window. This is the adjustment layers option window. We are going to select the fourth icon in the second row of icons.
Step 3.
This will create a photo filter adjustment layer. A photo filter adjustment layer filters a solid color over the whole image. You can chose between the filter or color options.
- Filter will give you 20 different options for the color
- Color will let you pick your own hue out of the color picker
Step 4.
You can also decide on the density of the color. This will make the color pale if you have the percentage on a low number and vibrant if it’s on a high number. I have chosen to use yellow because there are parts of the photo where I want to make the yellow stand out more.
Step 5.
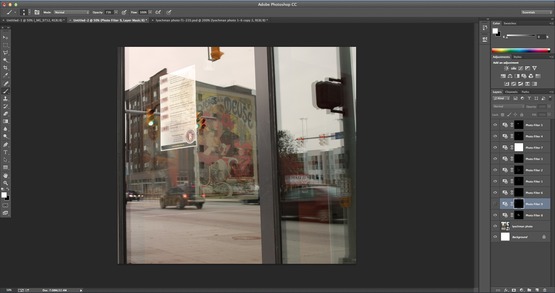
Now click on the rectangle and circle icon at the top of the photo filter adjustment window. Leave the density at 100% and set the feather to 1.6. Click on invert.
Step 6.
You should now have the original photo on one layer and another layer that is the photo filter adjustment layer. You will be working on the photo filter layer for this step. Select the paintbrush from the tools window on the left side of the screen. Set the paintbrush color to white.
Step 7.
Find the places in the photo that you want to make more vibrant that match the color you chose for the photo filter layer. Set the brush opacity to a lower number than 100% at the top of the screen or by right clicking if you find it to be too bright, or want to do a progression into the bright color. Setting the feather to 1.6 will feather out the edges of the paint and help it blend.
Step 8.
Once the image is colored, you can now change the layer opacity. Select an option from the blending mode menu. This is located to the left of the Opacity option in the layer panel. I set my photo filter layer to Soft Light, but feel free to try out all 27 options until you find one you like.
Step 9.
You can repeat steps 2-8 for any color you want to make brighter in your image!
-
Comments
0

- Tweet