

Blog . Cloning Pixels
Blog
10/28/13 | Posted by Leah Yochman | Posted in Digital Creativity


The clone stamp tool is used to duplicate pixels in Adobe Photoshop. It can be used to remove shadows from an image, get rid of marks or damage to photos, duplicate areas of a photo, and more.
Clean Up a Photo From a Scanned Negative
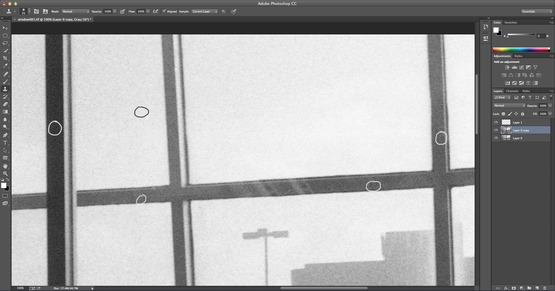
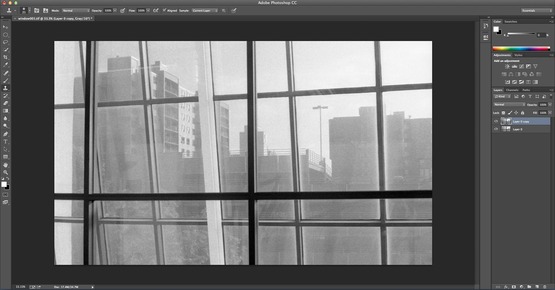
For this tutorial I chose to use a scanned negative from a roll of film as my image. This negative had some dust and scratches on it so I will use the clone stamp tool to get rid of them. First, open the image you would like to use in Photoshop and unlock the first layer. You can do this by double clicking on the lock icon on “Layer 0”. After the layer is unlocked select the “Layer” option at the top of the screen and click on the “Duplicate Layer” option. Now you have your original layer and a copy of it. Make sure when you are using the clone stamp you are working on the original layers copy.
Selecting the Area to Clone
For this image I had to zoom in to 100%. To zoom in on an image press the “Command” and “+” keys on the keyboard. After you have zoomed in as much as you feel is necessary select the clone stamp tool. Click on the icon in the menu to the left, two options will appear, the clone stamp tool and the pattern stamp tool. Find an area with an imperfection and use the clone stamp to select areas around it to use. Select areas that are of the same value, color, or tone to blend correctly. Press the “Option” or “Alt” keys on the keyboard and click to select the area. Now stamp over the imperfection in the photo!
-
Comments
0

- Tweet